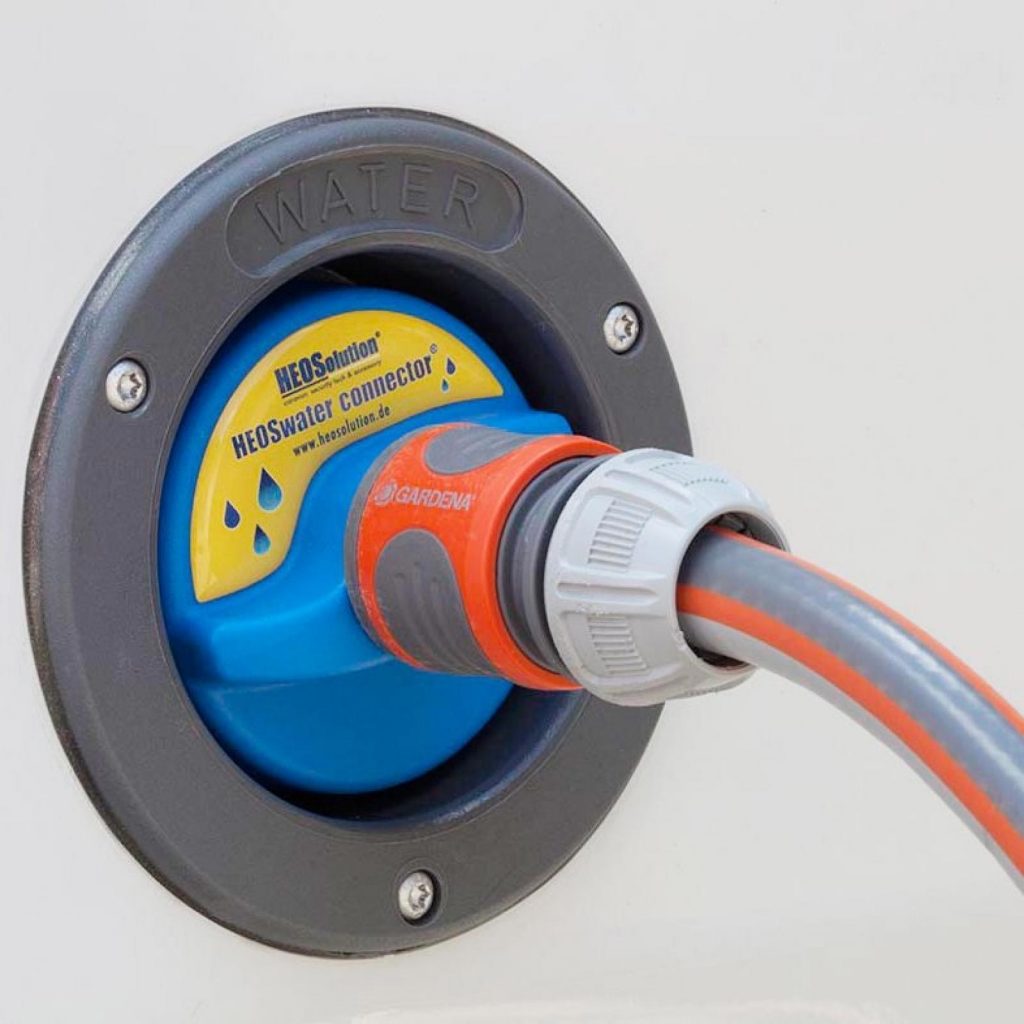
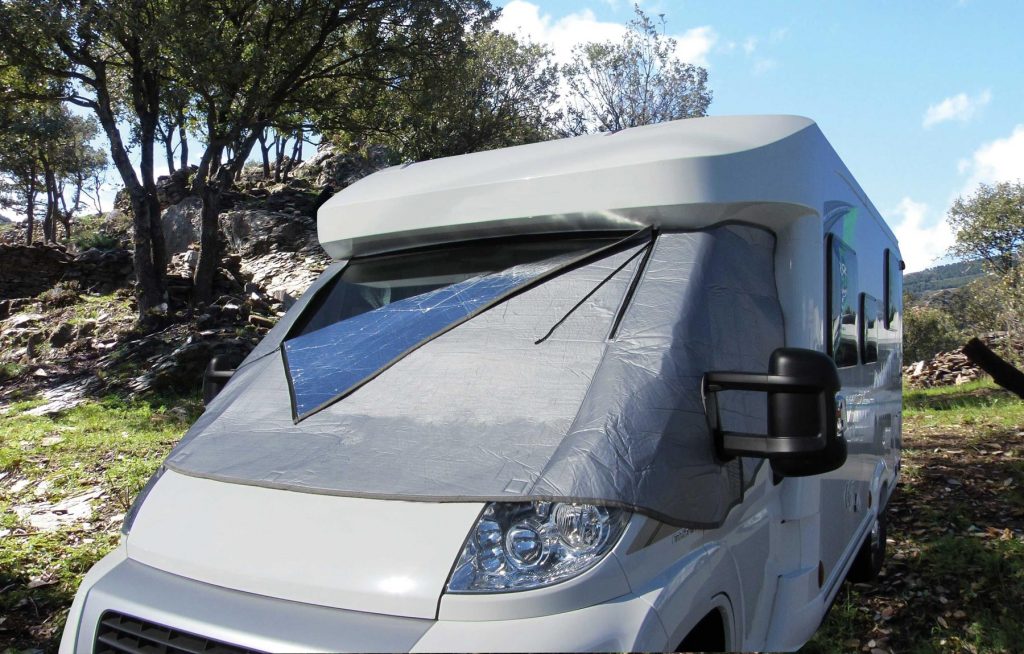
One of the biggest surprises to us when we first got our new motorhome was just how noisy it was. We are not talking about the engine here, but amount of creaking and rattling from within the main living area. It was unbelievable noisy, so much so we seriously considered turning back around and giving it back to the dealership… and this was only at the point of getting to the end of their driveway!

Thankfully we had made arrangements to stay at a campsite just a few miles up the road from the dealership where we could then begin to concentrate on reducing the shear racket. My word it was a noisy, to be honest deafening, few miles to the campsite!

We had heard and read many stories about the noise from the rattles but we were certainly not prepared how shocking it really was.  

Virtually all the noise from inside the motorhome comes as a direct result of poorly packing all the loose items in the various overhead lockers, under-seat and bed storage and the kitchen area.

Once we started searching the internet and other similar blog sites we heard a couple of them refer to the lockers as ‘good lockers’ and ‘bad lockers’ which we did not understand at first but as we began to deaden the noise potential and look closely at how we pack our motorhome it did begin to make a lot of sense.

Good lockers are the ones that have the best all-round access, they are both easy to get at and you can clearly see all of the available space. As a result of their accessibility they are also far more likely to be well maintained and organised in the future, hence minimal noise. 

Bad lockers, on the other hand, are just the opposite they are difficult to gain good access and you can’t see all the space available. These lockers could be bad lockers simply because you are not very tall and can’t actually see into your overhead lockers, or you have to be on your hands and knees. Some space is difficult to utilise properly as a result of all the heating and electrical items located in lockers, especially under the seating and fixed beds.  

One area that contributes to most of the noise is the kitchen. This is where you store the vast majority of the ‘noisy-items’ – pots, pans, cups, glasses, plates, cutlery, food (cans), condiments etc.  

Having identified the good and bad lockers we then set about gathering all the key items we are likely to have in our motorhome on every trip. We recommend kitting out your vehicle with all the items you need for every trip and permanently store them in the motorhome. If constantly moving items in and out every trip you will always have unwanted rattles. By keeping key items permanently in the motorhome you are more likely to learn how best to reduce the chances of noise. We appreciate this maybe expensive to purchase all the ’fixed’ items we do believe it is worth it, if only for keeping your own sanity!  

Keeping a large amount of fixed items in the motorhome also reduces the risk of forgetting something during the restocking between trips. 

Once you have ALL the fixed items together it will be much easier to allocate all the various storage spaces to specific items. This results in focussing and identify, the degree of storage required for each area of your motorhome. If you chose not to adopt this kind of approach then you are likely to end up purchasing more storage items than you may need and the wrong kind of storage items for the different ‘fixed’ items being stored. 

Storage Boxes and Containers

There are an unthinkable number of storage boxes and containers available. The key point to note hear is the importance of selecting suitable storage boxes specifically for your items and the space available. We strongly advice not to select storage boxes and containers based on how pretty they look, or what they cost! You will then spend time trying to find the best place for them and they will invariably be not fit for their purpose, available space or reducing the noise.

Soft fabric containers immediately have the advantage over hard plastic containers, they will be quiet if they slide about in the locker space or if the items they are to containing bang against their walls. Soft containers are a lot lighter than harder plastic or metal containers and they will not damage their storage areas if the move around. Their soft flexible walls allow items to be pushed and held together, more rigid storage has a fixed packing space.  

The tighter you can pack your containers, the more likely you are to stop the rattling.  

Mats and Foam

Mats are likely to be either rubber or more likely silicon in the kitchen storage areas. Putting mats between your plates and bowls totally eliminates them from rattling together.

Foam is extremely helpful in noise reduction efforts. It can come in either as thin matting or as a thicker a block(s). You could use the thin foam matting in a similar way to the silicon matting. Whereas the thicker, usually a little more robust, foam blocks to physically cut out holes and grooves securely hold items in place i.e. pot cups.  

Glassware

Glassware is, in our opinion, definitely great to have when travelling. It is great to have glasses for the alcohol and soft drinks but to some this is not a necessity and they are happy to have alternative plastic items. Whatever you decide is right for you it will affect the type of storage containers you need to use for these items. 

If like ourselves we prefer to have glasses for our drinks then you will also need to keep them apart so they do not rattle but also cushioned enough so they don’t break. We use a number of small silicon mats between our glasses. This holds them firmly in place and stops them from breaking. 

Look to place all your easily breakable items in the shame storage area. Not only does this make it easier to protect your breakables in one place but it also confirms an area of you motorhome storage that you know is purely for breakable items.  

What Goes Where?

Essentially, you have upper storage areas and lower storage areas.  

Upper storage – all your overhead lockers and over the cab 

Lower storage – all under the seating and fixed bed areas  

All upper storage must be your lighter items, especially your clothes, whereas the lower storage areas are for your heavier items. There are two important reasons for treating your storage this way. 

Firstly, you don’t want to have too much weight in overhead lockers as over time they are likely to become damaged or broken. Also, and possibly more importantly, is that you need to keep as much weight as possible as low as possible as this helps with the overall handling when driving your vehicle. Your heavy items are also best placed between the axels of your vehicle. Also avoid having too much weight towards the rear of your vehicle. Aim to store all your heavy items low down and between the axles.

Stop the Motorhome Door Rattles

This is one area we hadn’t considered as a point contributing to the overall noise. But it would appear that the doors on motorhomes are notorious for rattling and creaking. Unfortunately, there’s often not a great deal you can do to prevent this. Try to make sure the door is secure in its fittings and all screws are tight.

Having done this we still experienced a large amount of noise from the habitation door. On careful examination we found that our habitation door was actually buckled and would not fit correctly in its frame. This was a shock as the motorhome was only five months old when we purchased it. Thankfully it was covered by the manufacturer’s warranty, though due to Covid-19 it was not possible to repair it for almost 12 months. The resulted in it having to go all through winter with a poor fitting door!

Assuming the door is a good fit within its framework but the door itself feels loose, or if there is a draft, some draft excluder or foam strip around the edge may help to create a better seal, which will also stop the motorhome door rattling. Normally, the rattles are caused by the fixtures on the door rattling. Try adding a small piece of tape between the fixtures and the motorhome door, which might stop them hitting against each other as you’re driving.  

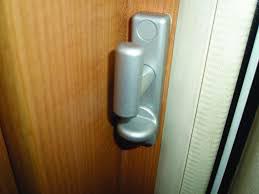
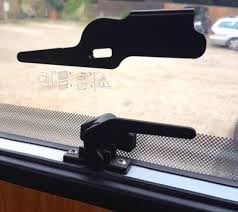
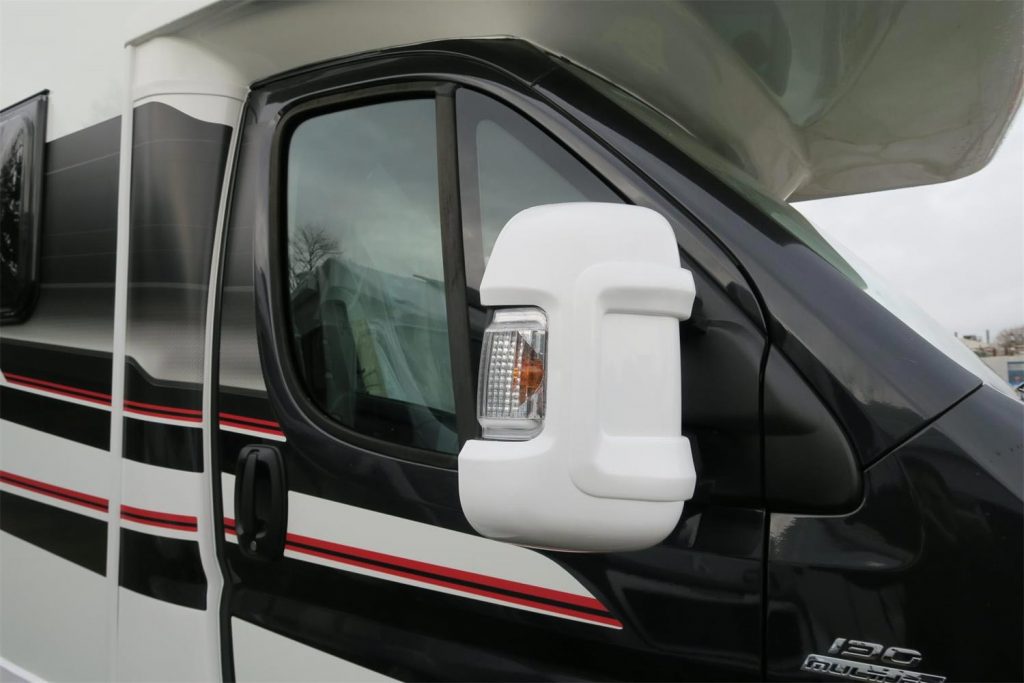
Rattling Windows and Door Noise

Another common culprit for motorhome rattles are the windows. As with the door, make sure they are secure and firmly held in place- it’s amazing how quickly screws can work loose while you’re traveling. We had to retighten one of our window latches as a result of one of the window catches becoming loose.

You could look at adding some thin foam around the edges of your windows but we would avoid this if at all possible. We advise to look first at fixing the root cause of the problem rather than treating the symptoms. This said it may still be necessary to reduce the wind noise whilst driving so some draft excluding material such as foam may still be needed. 

The Kitchen

Sorry, but what a pain this area is!

The motorhome kitchen is by far the worst culprit for our rattles. There are just so many dishes, mugs, cutlery, pans and other high rattle potential items in this area – it’s a never ending noise zone! This said, we have spent a great deal of time concentrating on this high noise area, and we must say our efforts have certainly been rewarded. Other recommendations:

  • Cutlery rattles can be stopped by placing a pot towel tightly over the cutlery drawer  
  • Put non-slip matting or tea towels between pots and pans so they don’t rattle. It also prevents damaging them 
  • Stop dishes rattling by placing paper plates between them. A great tip we learnt from our internet searches 
  • All pots, mugs, cups must be physically held apart, anything less will not work, simple as. They are possibly the highest contributor to van noise  
  • If you are to store and travel with a lot of tinned food then they will need to be well packed. This unfortunately means you can’t see the labels to see what’s inside. Simple… use a marker and write their contents on the top of their lids.  
  • Also, advisable to group similar types of food together. Put all tins of meat one side of the locker, vegetables at the other. You’ll find it easier to plan all your meals and help with keeping a well -stocked supply 
  • Draw up a list of your food at the start up your trips. Simply cross them off the list as you use them will make shopping to stock up much easier. 
  • Secure the oven shelves and microwave rotating table. Secure these items and stop the noise they produce will take you a long way towards reducing noise 
  • Place a mat between the glass cover on top of the cooker and the cooker rings 
  • Place a tea towel in the oven door  

We honestly do not think you can ever fully eradicate all the creaks and rattles, but we have definitely gone a long way in reducing them since that unbelievable racket of the first day we took ownership of our motorhome.

0 comment
0 FacebookTwitterPinterestEmail

Having spent a great deal of time and effort finding your ideal motorhome, camper van or caravan, not to mention parting with a significant amount of cash it is imperative you do everything possible to protect your investment.

It is our strong advice that you have most, if not all of the following, in place from the minute you take ownership of your motorhome.

Motorhome crime thankfully is relatively low, though there is clear evidence to suggest it is very much on the increase. It is a sickening feeling when you realise you have been a victim of such a crime. We have broken the types of crime into two distinct categories:

  • Theft of the motorhome
  • Theft of items within the motorhome – or “break-ins”

Theft Of The Motorhome

Motorhomes are becoming popular targets and sadly a large number are stolen each year. To return to your motorhome and find it is no longer where you left it, is simply unthinkable. You are simply left with that horrible sickening feeling in your stomach, or at least that is how we would feel. 

It is very difficult to sell on a stolen motorhome as a complete unit. However, motorhomes are usually stolen with the intention of quickly breaking them down for spare parts. This is how most motorhome thieves make their money.  

With this in mind your motorhome is unlikely to be stolen by an opportunist thief. Motorhome thefts are carried out by the professional organised thief, usually working as part of small gang of individuals.  

Thankfully, whole motorhome thefts are rarely carried out whilst you are out and about using your vehicle during the day. Whole motorhome thefts are far more likely to be stolen when they are left unattended overnight on you own driveway or at poorly secured storage facilities.  

Theft From Break-Ins

The big difference here is that the thief is far more interested in what goodies you have left in your van when you are not there, and we are not talking about crisps and biscuits!

This thief is far more opportunistic. More smash and grab approach, nick it and scarper. Here they are looking for items of value. Items they can easily and quickly sell to make a few quick bucks.

This kind of thief is also far more likely to do a great deal more damage to your van as he gains entry and whilst inside having a good ferret around looking for what he can carry away.

Motorhome Security

There are roughly three types of motorhome security we need to be aware of:

  • Security when the motorhome is unattended during our travels
  • Security when we are actually in the motorhome i.e. when we are asleep!
  • Security when we are not travelling and the motorhome is therefore sat on the drive way at home or in some kind of storage facility

Preventative Whole Van Theft Security

The degree of security that comes as part of your purchase is very unlikely to have enough ‘layers’ of security to prevent the motorhome from being physically stolen and driven away.

It is fair to say that most motorhomes, especially the more recent models, will have the following built in as standard:

  • Intruder alarm system
  • Engine immobiliser
  • Tracker device

On the face of it this seems to be a fairly decent collection of security safeguards, which it is, but it is in our opinion nowhere near sufficient to prevent the professional thieves. The professional thief is fully aware of these types of security and more importantly he expects them to be there and how he can quickly deactivate them.

We therefore need to include far more visual layers of security. We want the thief to take a look at our motorhome and quickly come to the decision that it is going to be too difficult or take a lot of time before they are in the position to drive away with it. We want the thief to think it’s not worth taking the risk of being caught in the process.

So, what additional layers of security can we add, or at least consider? We have first listed below the additional layers we have actually added to our motorhome and in no particular order.

Door Pro-Plates

A large percentage of motorhome cab doors are vulnerable and fairly easy targets for thieves to first try and gain entry into your vehicle. Without exactly describing how they do it, they can quickly force entry via the actual cab door handle area in a matter of seconds!

We have fitted specifically-manufactured metal plates and internal door lock guards to both our cab door handles to combat such forced entry. These metal plates are commonly referred to as Pro-plates.

Pro-plates are a clever, innovative range of security products designed specifically to protect the vulnerable area surrounding the door handle(s) normally targeted by thieves. Made from stainless steel, no drilling is required as they are secured to the vehicle by slotting behind/around the existing handle. Using the silicon sealant supplied they are then firmly secured by sandwiching them between the door handle and the main door panel.

In most instances, there is no need to remove the manufactures internal door. They are favoured also by many commercial van/fleet operators; this is a very cost effective solution to a very common problem.

Pro-plates offer an ideal deterrent helping to prevent break-ins and are equally suited for re-securing a door(s) after a theft has been attempted.

They took a little over 1hr to fit per door on our motorhome as I had to remove all the internal door trim and the Remis type window blinds. Whilst a fairly straight forward DIY task I do recommend you use the plastic purpose made trim removal tools. They are not expensive and worth every penny as they help prevent damaging the trim if you decide to use metal screwdrivers and the like.

VIN CHIP™

Vin CHIP was already installed on our motorhome when we bought it. It was not pointed out to us during the purchasing process from the dealers, so it came as a pleasant surprise when we discovered what VIN CHIP actually is.

VIN CHIP™ is a theft deterrent and identification system for motorhomes (and campervans and caravans). designed to deter criminals looking to steal motorhomes and to help aid the identification and recovery process. If fitted, the VIN is the first thing the police look for to identify your motorhome. 

A specific 17-digit VIN is as unique as your fingerprint and VIN CHIP™ uses both visible and invisible markings using three key elements: 

1 – Electronic Radio Frequency Identification (RFID) Chip 

Hidden inside the motorhome making it more secure and easier for the police to detect and identify your property. 

2 – Highly Visible Tamper Evident Lozenges 

The lozenges contain the motorhomes unique 17-digit VIN and demonstrates to potential thieves that the caravan is protected by VIN CHIP™ security. 

3 – Scanable QR Codes 

Two tamper evident labels featuring QR codes and all the CRiS details including your unique VIN, one for the master window and one for inside the gas bottle locker. No other security system is quicker in establishing the identity of a motorhome. 

Though we are not sure for certain but we are led to believe that VIN CHIP™ comes as standard on all UK motorhome and caravan models manufactured after 2016 by NCC members. Each unique VIN is recorded on the CRiS registration database meaning that if your motorhome is stolen and either the police or a future buyer uses the VIN to conduct a CRiS Check, it will be flagged on the CRiS database as stolen. It is important to make sure your CRiS registration is up to date.

There are three packages to select from:

  • VIN CHIP™ Pack – suitable for pre-2016 motorhomes and caravans, all you need to add to your vehicle to ensure it is protected by the VIN Chip police traceable scheme.
  • VIN CHIP™ Plus – suitable for all models, for added identification VIN CHIP™ Plus offers a unique VIN marking for internal and removable items. 
  • Bundle Package – keep your motorhome and its removable items protected with both VIN CHIP™ and VIN CHIP™ Plus.  

Wheel Clamps

The wheel clamp we elected to buy was one from Milenco, UK. In reviews it is said to have won every attack test for the past decade, with exceptional and unsurpassed attack resistance (quite a claim!). It’s a single clamp that goes around one of the rear axle wheels and designed to prevent theft and drive-away when parked in a car park, on your drive, left at the campsite or when in storage.

We think the Milenco’s Wheel Clamp is an exceptional theft deterrent with its Sold Secure Gold rating and approved to the world’s highest accredited International Security Standard SCM MP03.

With its pick-proof locking mechanism, it offers ultra-high security, steel construction to resist from sawing and freezing this wheel clamp offers exceptional protection. The latest locking mechanism has been re-engineered making it far easier to line-up and ultimately much easier to fit without comprising on protection. 

The Milenco Wheel Clamp comes complete with three keys and fits both steel and alloy wheels. To prevent the clamp from marking and chipping the alloy wheels, the clamp has a protective foam backing.

Steering Wheel Lock

We selected this version of Milenco’s high security steering wheel lock which has been specifically designed for commercial vehicles such as vans, HGVs, tractors, industrial plant and motorhomes.  

The lock is identical to the car version but is 150mm longer, to ensure a perfect barrier to turning the steering wheel. The locking bar on this version is 670mm overall; it is 520mm on the car version.   

Milenco have taken their classically designed high security steering wheel lock, which was originally approved to the Thatcham standard, and completely re-engineered it to enhance its security so that it would pass and exceed the Sold Secure Gold Automotive standard. The Sold Secure standard was jointly developed by the Master Locksmiths Association and Police to promote the use of good quality, secure anti-theft devices. Their definition of their Gold rating is “offers the highest level of security” and is two and half times tougher than the old Thatcham standard were.   

This Milenco high security steering wheel lock is quality engineered in the UK. It is a highly visible and powerful theft deterrent. Milenco are confident that this is the strongest and most secure steering wheel lock ever made. It has a unique, innovative design that allows for fast and easy fitment in just a few seconds. It comes with three high security keys which are both durable and highly reliable. 

It’s an effective solution to the theft of vehicles that have modern keyless entry proximity key fobs. These vehicles are often electronically compromised by criminals, resulting in consequential vehicle theft. The steering wheel lock acts as both a strong visual deterrent and a significant barrier to driving the vehicle away. 

Driver’s Seat Lock

We selected this version of Milenco’s high security steering wheel lock which has been specifically designed for commercial vehicles such as vans, HGVs, tractors, industrial plant and motorhomes.  

The lock is identical to the car version but is 150mm longer, to ensure a perfect barrier to turning the steering wheel. The locking bar on this version is 670mm overall; it is 520mm on the car version.   

Milenco have taken their classically designed high security steering wheel lock, which was originally approved to the Thatcham standard, and completely re-engineered it to enhance its security so that it would pass and exceed the Sold Secure Gold Automotive standard. The Sold Secure standard was jointly developed by the Master Locksmiths Association and Police to promote the use of good quality, secure anti-theft devices. Their definition of their Gold rating is “offers the highest level of security” and is two and half times tougher than the old Thatcham standard were.   

This Milenco high security steering wheel lock is quality engineered in the UK. It is a highly visible and powerful theft deterrent. Milenco are confident that this is the strongest and most secure steering wheel lock ever made. It has a unique, innovative design that allows for fast and easy fitment in just a few seconds. It comes with three high security keys which are both durable and highly reliable.

This device is an effective solution to the theft of vehicles that have modern keyless entry proximity key fobs. These vehicles are often electronically compromised by criminals, resulting in consequential vehicle theft. The steering wheel lock acts as both a strong visual deterrent and a significant barrier to driving the vehicle away. One device we have added to our van security is really intended for motor cycles. It is jaw type lock that is intended for locking the motorcycle wheel disc. 

I have fitted it to the base plate of the revolving seat in the cab of the motorhome. I thought if I can lock the seat facing backwards it would be impossible for anyone to drive it away. To fit it I simply swivelled the driver’s seat round so that it faced into the motorhome. I then drilled a hole in the swivel base plate of the seat which provided a close fitting hole for the location pin of the JDC Disc Lock.  

It is a great addition to our security layers. It is very brightly coloured so the thief can easily see it, even from the outside looking in. It is also very solid and well-made item.  

It has a sensitive alarm that is activated once it senses any movement. The alarm, at 110 dbA, is enough to tell the intruder that it may be better to go elsewhere! 

In addition to all the security mentioned above we also ensure that we try and park the motorhome in clear sight to the general public as the thief is unlikely to want to try and break in to steal the motorhome. We also, where possible, use official campsites and avoid the amount of wild camping where we would possibly leave the motorhome unattended and possibly tucked away and out of general view. The vast majority of campsites have their own layers of security, especially security gates/barriers, night time lighting and CCTV surveillance.  

In a way we see our site fees as partly paying for that additional security to add to our own security layers. 

Prevention From The More Opportunistic Thief

All the layers above should, in theory, be sufficient to deter any thief. However, we have added even more security specifically aimed at the more opportunistic thief who, rather than looking to steal the motorhome, is looking to steal loose items from within the motorhome as quickly as possible then leg it!

Entry points to the motorhome are where we concentrated our efforts for the extra security:

Door Chains

The main cab doors are again the main entry point so we installed an additional layer of security. Here we added security door chains from Womo Tuning. They are a clever device that utilises existing fixing points in the door and the seat belt anchor points. If the thief is successful in gaining entry having navigating their way through the entry alarm and central locking systems, then they will find it almost impossible to gain any further entry as a result of the door chains.

Habitation Door Lock

Failure to gain entry via the cab door put our focus on the habitation door. Here we fitted a Milenco security door lock. This is fitted externally and the body of the lock is fitted to the motorhome side wall. It has a swivel arm that then slides over the habitation door.

A lot of these types of locks can only locked from the outside. The lock we chose can be opened and locked from inside the motorhome as well. This we feel is a great additional feature of this type of lock and well worth paying the little extra.

Window Locks

The windows were next on the list. Here we installed some excellent items manufactured by Lock M Out. Made in the UK from mild steel and powder coated in black to match the window catches they are sleeve/shroud like product that slide over the individual window latches.

The design prevents the window latches from being lifted with them in place. This also prevents them being lifted by the thief from the outside with a ‘bent nail’! 

We all know that motorhome and caravan windows are essentially plastic and therefore if a thief is determined to enter your motorhome then they could simply smash the window. Clearly no amount of security will prevent this but we think an opportunist thief will not break the windows unless he is desperate to get in and has plenty of time where he will not be detected breaking in. 

Night Time Security

Sadly break-ins do happen when we are actually in our vehicles. This I think you will agree is a really scary prospect.

Thankfully we have a large number of security devices fitted to our vehicle, as detailed above. Collectively it makes it extremely difficult to gain access to our vehicle, day or night.

We also mentioned earlier that we have a security door lock on our habitation door. By paying that little bit more we have a security lock that can be opened and closed and locked from the inside. This is a major security addition for any time of the day protection.

We also set the alarm on our motorhome at night. It will be activated if anyone opens either of the cab doors and it also has motion sensors in the cab area. As long as we don’t go near the cab area then we won’t activate the alarm ourselves during the night.

Additional Security

Some would, and do, argue that it is almost pointless and actually a waste of money by adding large amounts of extra security layers to your motorhome? They believe that if a thief is committed enough they will get through amount of security.

We certainly do not support this thought. Rather we feel that the more security you have the more it deters the thief and they will simply move on and look for more less secure targets.

For us the amount it costs for all our security, and possibly more items yet to be added, far outweighs the feeling of loss be it our belongings, valuables or the motorhome itself.

The list below is additional security we would recommend to also be considered as part of your motorhome security layers:

  • Cab door deadlocks
  • Safe
  • CCTV
  • Clutch claw
  • Roof registration plate sticker
  • Sky light alarms (this will be our next layer of security)
0 comment
0 FacebookTwitterPinterestEmail

In addition to all the security items and associated costs there is also a large amount of items that are considered essential for the day to day needs of travelling in your motorhome. Before we collected our motorhome we did a fair bit of research into what others considered to be essential items. What we found was that there was definitely a common list of items and then there are the essential items specific to the owner’s needs and requirements.

From the start we think it is important to bear in mind that there definitely is a list of essential items needed by everyone, but you must not confuse this with items that would simply be ‘good-to-have-just-in-case’. The reason for mentioning this is that the good-to-have-just-in-case items are invariably rarely used or indeed ever needed. And secondly these items are taking up valuable storage space and only adding to your all-important payload of your motorhome.

So, let’s start by taking a look at the essential items on virtually everybody’s list:

Fire Extinguisher, Smoke Detector, Carbon Monoxide Monitor, Fire Blanket and First Aid Kit


We have grouped these items together as they are invariably all spoken about and catered for in the same breath. These are the minimum essentials for your personal van safety and wellbeing as opposed to van security.

Electrical Hook Up (240V)

In our opinion it is important to purchase a long hook-up cable. We have found that the distance between hook-up points and our motorhome vary enormously. A cable of around 25m should be more than enough.

It is important to point out that by having a long power cable you must ensure that the extra length it is not left coiled up. We spread it all out then through the excess length under the motorhome. We have ours rolled up on a reel. Being an engineer we have it rolled up on a plastic welding wire reel. It is then placed inside another bag similar to the one we use for our water hosepipes.


We have, more than once, found it necessary to have to share the main hook-up point. This means one of you needs a mains splitter. Rather than rely on the other person having one it is best to have your own. It may only be need once a flood but it becomes essential when needed.  

Most storage sites do not offer any electrical hook-up facilities. Therefore it is necessary every couple of weeks or so to top up the batteries (engine and leisure). Some do this by having plenty of solar power available, but the motorhome batteries are still likely to require a good long run or charging up through the winter storage.  

We simply collect our motorhome from storage and bring it home. Here we can put it on our and hook-it up for the day. To do this you will need a short hook-up adaptor cable.  On one end a domestic (UK) 240v wall plug and on the other a plug socket that fits into your main motorhome hook up lead.  

Hosepipes

A must have for filling up your main clean water tank. We highly recommend two lengths one approx 3m long and the other 12m long; these can be both made from a single 15m length of hose. Depending upon location and task to be carried out, it is best to have both length options at hand. Food grade hose is preferable but not essential (blue in colour).  

We prefer a ‘proper’ hosepipe to a flat hose, but a flat hose is a lot easier to store. Personally, I hate the flat hosepipes with a passion. For me a carefully stored proper hosepipe is the way to go. The flat hosepipes sound a great idea, and to many they are, but for me they are not what you expect. We have however provided images of both designs.  


Regardless of which hosepipe you select, we advise that it is stored in its own ‘bag’, especially the non-flat hosepipes as they simply end up a twisted mess in your locker space. The bag will also help to keep the hosepipe clean as it is the hosepipe for your clean water. We also use this type of bag for our electric hook up cables. 

A lot of people simply push their hosepipe directly into the bore of the filler pipe leading to your water tank. In theory this is fine but there is also the possibility of you adding dirt or other contaminants into your fresh water tank. To ensure that you keep your fresh water as clean as possible we suggesting using a specific adaptor called a HEOSolution adaptor.

Hosepipe Connectors and Adaptors

A selection of water hose connectors we feel should be part of the essential list of items. Hosepipes, water pipes, fittings, taps have a number of different connection options. We there recommend you carry a small selection of connectors and adaptors to cover all your bases as you move from location to location. When purchasing these we also recommend you look at metallic, usually brass, as these are far more durable than the plastic options, though they are a little more expensive.    

Levelling Chocks

Prior to purchasing our motorhome, more specifically our first overnight stay, I always thought that these were not essential items… how wrong I was.  

Despite best efforts the majority of site pitches are not level. After just a single night sleeping on a pitch that was not level did we quickly realise their importance and why they appeared on everyone’s essential items list.  

We now use the Fiamma levellers and chocks.

Mud Mats

Oh yes… definitely essential! We found out very quickly that motorhomes do not like the slightest amount of moisture on grass, and certainly not wet, soft ground. We spent an afternoon tearing up a CL site ground trying to get on to a grass pitch that we thought looked ok. The giveaway that this was possibly not the case was that there were no other vehicles in the field!?  

Tyre Repair Kit

Another of those items that we first thought not to be essential. We quickly changed our view when we had an occasion for the low tyre pressure warning light came on. On this occasion the tyre only need pumping up. But it made us think, what if we had had a puncture? We do have a spare, hung underneath the motorhome, how very convenient… not!  

The simple kit shown would be a great alternative for the repair of simple punctures. Thus preventing the need to grovel under the motorhome to free up the spare and/or not have to call for breakdown assistance. 

Roadside Emergency Kit

No one wants to really consider breaking down but sadly this does happen and the longer you have your motorhome the more likely it is that at some stage it will happen to you. In some countries there are legal requirements that stipulate exactly what you must have… or be fined! Here in the UK, it is more advisable but it’s not a bad idea to try and have the breakdown kit required for overseas as a minimum.  

Sat Nav

Currently we are still finding our way around with the likes of Google Maps. This said we know that in the not too distant future we will need to invest in a sat nav that is specifically tailored to the needs of motorhome travel. 

As we get more used to driving it around and becoming more adventurous, it will be necessary to have a sat nav that stops us getting stuck in narrow lanes or under bridges!

They are not a cheap item but neither is your motorhome, bite the bullet and invest!

Tool Kit

With regards to tools you have to face up to the fact that you will never have enough tools to fix and cover all eventualities. The purpose of the tool kit in our eyes is one that is capable of fixing and repairing the smaller more routine events of motorhome living.

The other thing is that if you try and cover for all eventualities then the sheer weight of your tool kit will seriously hamper your overall payload weight. Your tool kit should ideally be contained in a light weight tool box or a strong bag i.e. avoid all the metal tool boxes.

You may want to add a power tool such as a drill with a selection of drill bits to your tool kit. You do not need to purchase anything like an expensive DeWalt or a Makita. For general purpose tasks I am a fan of the Parkeside range of power tool, often found in the centre aisle bins at Lidl! Also consider the Bauker and Mac Allister power tool ranges.

Wing Mirror Protectors

We purchased a set of these when we collected our motorhome. They have already paid for themselves by saving the expenses of having to buy new wing mirrors on two separate occasions. In the early days of driving the motorhome it is easy to forget how much the wing mirrors stick out.

We have hit a wall and a tree already, thankfully not too hard, but had we not had the protectors on I am pretty sure we would have had to replace at least one of the wing mirrors. They are well worth the money, highly recommended, and definitely essential. We purchased the Milenco protectors.

External Blackout/Thermal Windscreen Blinds

Without doubt the best essential item we have purchased. Not only does it ensure total blackout at night time but more importantly it totally removed condensation on the inside of the windscreen. Initially we purchased a window vac to literally vac up the condensation from all the windows each morning.

We had read many mixed reviews about how effective such items are with regards to blackout and removal of condensation but our experience is that they are perfect on both accounts. Our advice is not to buy internal blinds with the hope of achieving the same thing.

We can only speak of our own experiences and understand this may actually be not the same assessment by others. A fantastic, highly successful purchase.

Not Essential, But Really Good To Have...

  • Spare bulb kit
  • Selection of cleaning and toilet chemicals
  • Small hand held vacuum cleaner
  • Dustpan & brush
  • USB/battery charging station
  • A safe
0 comment
1 FacebookTwitterPinterestEmail

We are sure like many of you that the decision of what to buy causes far more deliberation than anything else in the selection of your Recreational Vehicle (RV). Before purchasing your vehicle a clear understanding of what is available on the market must be identified and fully understood. This applies to both the new and used vehicles.

To help ourselves we travelled to a large number of dealerships over several months. This allowed us to spend plenty of time looking and sitting inside the vehicles. This really helped us to get an understanding of how the various options and layouts would, or would not, work for us. How we would relax, how we would eat, sleep, use of the bathroom facilities, storage etc. We strongly advice that you do not rush this key part of the selection process. The longer you spend the better your final decision be.  

It also gave us a lot of time to speak to the dealerships that, as you would expect, were more than happy to spend time informing us of the pros and cons of owning a caravan, campervan or motorhome. Even the pushy sales persons still had plenty valuable information for us to consider.  

It was during this early stage of the process that we made the decision to purchase a relatively new vehicle and from a dealership we felt were the right people to deal with from our point of view. Having looked at several used vehicles, I personally, was very nervous of parting with a large amount of cash to a member of the public I had never met and would have virtually no comeback should there be any mechanical, electrical or legal issues that were not made clear at the point of purchase. At this same point we also realised that we wanted the vehicle to still have a certain amount of dealership and manufacturer’s warranty protection.   

There are numerous ways that one can go about such a detailed assessment, below is the basis of how we set about the task. We hope you find it helpful or at least thought provoking enough so that you too can make a considered decision that is right for your own specific needs and requirements. We are sure that some will completely disagree with our own analysis and reasoning but this is how we reasoned and rationalised various decisions that were important to us.  

An individual or couple for example, who are active, adventurous, love the greater outdoors, happy to move around without all the luxuries of home  and love to wild camp and as much as possible may well find their own assessment indicates that a campervan (or panel van) may be the vehicle for them. On the other hand a couple with children may well decide that the caravan offers them the better family holiday option. 

So with the above in mind, we next set about identifying what type of RV we believed was the right choice for us; would it be a caravan, campervan (including Panel Vans) or motorhome?  Please note, our assessment scores below are also based on two, active, semi-retired +50 year old adults.  

Despite carrying out the above exercise with an open mind as much as possible, we must confess that we would not have considered a caravan personally as we had no desire to consider towing. For this reason we have marked down the caravan option accordingly. For those willing to tow a caravan the scoring would be considerably different.

This said we feel it would only skew our own scoring exercise in relation to just the caravan and campervan options. Therefore, for us and our needs and wants the motorhome option would have always resulted in it being the best option for ourselves for many other reasons.

Clearly, such a selection process is highly, highly, subjective and flawed in a number of ways but it did help us learn a great deal more about the options, ourselves and of what is important to us, far more than if we had not done this.

Some people have suggested “try before you buy”. On the face of it this does sound like a good idea, and for a large number of people it probably is. However, for us we did not think this was the right way to go. With so many important selection criteria we don’t believe a few days a Caravan, Campervan or Motorhome answer enough questions and therefore, for us, not a cost effective option.

Our view is that you will learn so much by visiting reputable dealerships and simple sitting in all their vehicles, for long periods of time, and ask yourself all the questions you need answers to. This approach will get you a long way down the selection process.

We hope this has been helpful and provoked plenty of thoughts and ideas. Please feel free to contact us if you would like to chat more.

0 comment
0 FacebookTwitterPinterestEmail

At the time of purchasing we had not even considered what was required to winterise our new motorhome and when is the right time to do it. We were still mega excited with our new purchase and just thinking about where and when we were going to travel. Sadly our excitement was quickly dashed as we entered yet another Covid-19 lockdown.

In a way this began to focus our minds on what we needed to do to ‘personalise the motorhome’, more in keeping with our own specific needs and remove (in a nice way) the newness feel. (Need to hyperlink through to the Personalising Your Motorhome). As a result of the lockdown restrictions and the time taken to personalising we quickly found ourselves heading into winter.

This has been a rapid and to be honest slightly stressful learning curve as we encountered a number of problems that needed resolving. We were very happy spending time away in fantastic places, in great weather, but as we have found out you need to prepare for the winter months well in advanced. We hope the following will be helpful in your own preparation and avoid the pit falls we encountered.

Carefully winterising your motorhome is essential to avoid damage as well as ensuring it will be in perfect condition for when the better weather arrives. It is true some people live in their motorhomes all year round. Whilst they do not put their vehicle into several weeks of physical storage they constantly have to be taking measures to keep their vehicle in top condition through the winter months.

Often overlooked is the need to maintain your vehicle, especially during the winter months when it is more likely to experience damp, mould, frozen pipes etc, as it is almost certainly a requirement of your motorhome insurance policy. Most policies state that they will not cover damage caused by water freezing inside the motorhome pipework and heaters between November and March. Cold weather can also cause damage to tyres, engine, breaks, seals etc.

In this blog we are looking only at what is required to prepare your motorhome for winter storage. This simply means the shutting down of the motorhome for a couple of months.

Before you start – read your owner’s manual

This blog should be read as an addition to the processes described in your owner’s manual—not a replacement!

So, let us start by looking at when you should start to winterise. For us this is when it first starts to show signs of there being frost overnight. This does not mean you should cut your trip short and return home asap to put your motorhome into immediate storage. It is purely an indicator, the first signs that the weather is getting colder.

Once you have made the decision to shut your motorhome down for a couple of months we, if possible, bring your motorhome home and remove virtually all the lose items. Probable advisable to have cleared the spare bedroom first!

  • Clearly remove all valuables – thieves do not go into storage over winter!
  • Remove all food and drink – tinned food should be ok to leave, though anything that has a high liquid content should be removed, especially fizzy drink or bear cans
  • Remove all packet food items, sauce mixes, herbs and spices, flour, sugar etc
  • Remove all cleaning and toiletry products
  • Remove all soft furnishings bed linen, clothing, towels, coats etc. We don’t remove our curtains, though we understand some people do. Same with all our seating and cushions. What we do though is remove them from touching the walls of the motorhome.

As this blog is written as we enter our first winter since purchasing the motorhome we have actually removed the two mattresses from the fixed beds. In time we may look to leave them in the motorhome over winter.

  • Remove all expensive electrical equipment
  • Ensure ALL your layers of security are in place at all times during storage.

It is really not practical, or necessary, to remove every single item from the motorhome. We do know people who have plenty of home storage, such as a large garage space, remove everything that is not nailed down! Personally we think that is not necessary but… So all our key essentials remain:

  • Gas propane bottles – ensure they are disconnected and turned off!
  • Windscreen blinds
  • Hand vac and dustpan and brush
  • Tools
  • Camping chairs
  • Pots and pans
  • Cutlery
  • Levellers and chocks
  • Water hosepipes
  • Electric hook-up cables

Once everything is removed we recommend:

  • Giving the motorhome a thorough clean, inside and outside. It is also worth topping up on the water repellent wax layer.
  • Wind out the awning and give it a good check and clean (remember to ensure it is dry before winding it back up.
  • Remove all fridge and freezer items then clean it, leaving the main door set ajar.
  • Leave all the lockers, cupboards, drawers and wardrobes doors open unless they are well ventilated

Draining Down

DISCLAIMER: This is a generic guide. Most motorhome systems are very similar, but please do check your owner’s manual before following these steps. If in doubt, ask your dealership or a local garage for advice on your specific model.

Empty ALL systems over a suitable drainage point. (If you can angle your motorhome to get as much as possible out, even better!)

Make sure you have emptied the freshwater, wastewater, water heater tank and toilet flush (if separate from freshwater)

Open all internal taps and LEAVE these open all winter.

If you have mixer taps, leave it open it in the middle so both sides are on.

If you have inline water filters, disconnect and empty these.

Leave the water pump running until taps run dry, then turn it off quickly to avoid pump burnout

Remove the showerhead and drain water from the hose. Leave the hose hanging down into the shower tray, over the bathroom drain or a bowl

Check underneath the motorhome and make sure the u-bends are as empty as possible. This is normally where the shower u-bends are

If possible, go for a quick drive to swish things and ensure everything is as clear of water as much as possible

On the point of draining down and flushing the lines it may be worth considering blowing the lines clear with system that pushes air through the pipes

Batteries

This is one area that has caused us a fair amount of grief. I personally have been very surprised how quickly both the engine and leisure batteries have lost their charge.

Leisure battery – currently our leisure battery is charged by an 80 Watt solar panel or when we are on electric hook-up. Though yet to be confirmed it is not charged when the engine is running? As a result of being in storage without electric hook-up and the lack of sun our leisure battery lost its charge in just a matter of a couple of weeks. We had it tested at the time and the battery was in good condition but simply required fully charging.

Engine battery – in a similar manner to our leisure battery the engine battery lost its charge a lot quicker than I had envisaged. Whilst in storage the only thing we can think of that is dragging the charge down (apart from the cold weather) is the alarm system. Once again we had the battery checked and it was confirmed to be in good condition but required a fully charging.

We have removed both batteries and brought them home for charging. We intend to keep them at home until we are in a position to travel. Having the motorhome with no batteries installed means that the alarm is not active but it does mean it is unlikely to stolen, certainly not driven away.

During our issues with the batteries we had the miss fortune of physically locking ourselves out of our motorhome. Without batteries it is not possible to use the central locking mechanism, plus we have additional security an all the doors so we could not gain access. Thankfully I have not put on too much weight during the Covid lockdown so I was able to access the motorhome via the outside locker, just!

NOTE: Even if stored at home, batteries will need top-up charging every 4-6 weeks to prevent problems.

Antifreeze

Personally I will look to avoid using antifreeze at all costs, certainly ‘regular’ toxic antifreeze in our fresh water supply system. We are aware of safer non-toxic antifreezes being available but if the lines a blown clear then there will be no need to use any kind of antifreeze products.

Out central heating system is a closed liquid/antifreeze system so we should not experience any burst pipes from freezing.

Storage Cover

Currently we do not have a cover for our motorhome whilst it is in storage. However, we are seriously considering investing in one for next winter. We cannot see any reason why this wouldn’t be anything but a good decision.

In addition to keeping the motorhome clean it also adds another layer of insulation and protection from the winter weather. Only negatives we can see is they are difficult to put on and good quality ones are not cheap. But we think the positives far outweigh the negatives.

If purchasing a cover then we recommend purchasing one that has dedicated access to all the doors.

Rodents and Vents

Strange that we have put these together but we feel they have a connection!

Vents in a motorhome are important, very very important; they are there for your safety. They should never being blocked off. This said this is how the mice and rats can enter your motorhome. Vents on your motorhome should have a protective mesh covering the holes, thus preventing such undesirables from entry.

Regular Checks

With your motorhome now in storage for several weeks it is important not to ignore or neglect it. As a minimum you should consider the following,

Check on your motorhome regularly, we would suggest every 2 or 3 weeks

Check for any fluid leaks, engine oil, radiator fluid, etc

Start the engine each time of visit, ideally take in on a decent run to get everything warmed up to temp

If not taking it out for a short run then at least move it from the position it has been stood in and put it back with the wheels in a different position

Avoid pulling on the hand break. Apply some resistance but place it in 1st or reverse gear

Check Tyre Pressures

Before restarting your travels check you can gain easy access to the spare tyre and it is in a condition to be removed/used if needed

SALT – Throughout the whole storage period we highly recommend placing a number of small containers holding salt. Salt absorbs moisture and works at controlling/reducing the amount of free moisture in the motorhome. Change the salt with fresh every 2 or 3 weeks. The old salt can be brought home and dried in the microwave ready for reuse

The above comments are purely our own. We hope they have been helpful. Our advice is to visit other motorhome, campervan, caravan blog sites as they will provide a great deal more information on how best to winterise your vehicle.

0 comment
0 FacebookTwitterPinterestEmail